French Grain Sack Chair Reupholstery

I bought this rough looking Eastlake Victorian chair at an auction last year. The first thing the kids and the hubs said as I was loading into our truck along with a few other goodies was:
“What's that piece of junk?”.

They just have NO imagination sometimes!
They saw junk whereas I was visioning a thing of beauty because that's just the way I roll.
She was all dark and gothic with her red, crush velvet upholstery. I couldn't wait to rip it all up and build her back up again.
Yes, we furniture “designers” refer to our furniture as he's and she's. They're like our children in the unanimated sense. Plus, they don't talk back when we do something they don't like!
“You will take that upholstery staple and you will like it!”
So my daughter and I got to tearing carefully removing the red velvet upholstery while saving each piece as a template for the grain sack I was going to replace it with. Our allergies were just loving this!


Yes, this is me pulling staples out while supporting the chair with my feet.
It was that hard!
What you should know at this point is that I have never done anything like this before. The closest I've come to it was a slipcover course I took way back – a million years ago – in 1996. So as I'm taking things off, I'm making notes on how it's suppose to go back on.
Like my reupholstering tools!

Trust me on this when I say it took a lot of staring at this chair to make sure I didn't screw it up.

After all the “necessities” were off, it was time to repair any loose legs, screws, etc. In other words, tighten it up so fat old Aunt Bertha didn't sit on it and crush it into oblivion after all my hard work! I was lucky that the chair was still in solid condition after being so old. She needed some work on the front two castor wheels, but I need more research on that so I was putting it off till last.
This is why I prefer antique – all wood – furniture to that cheap MDF stuff from China!

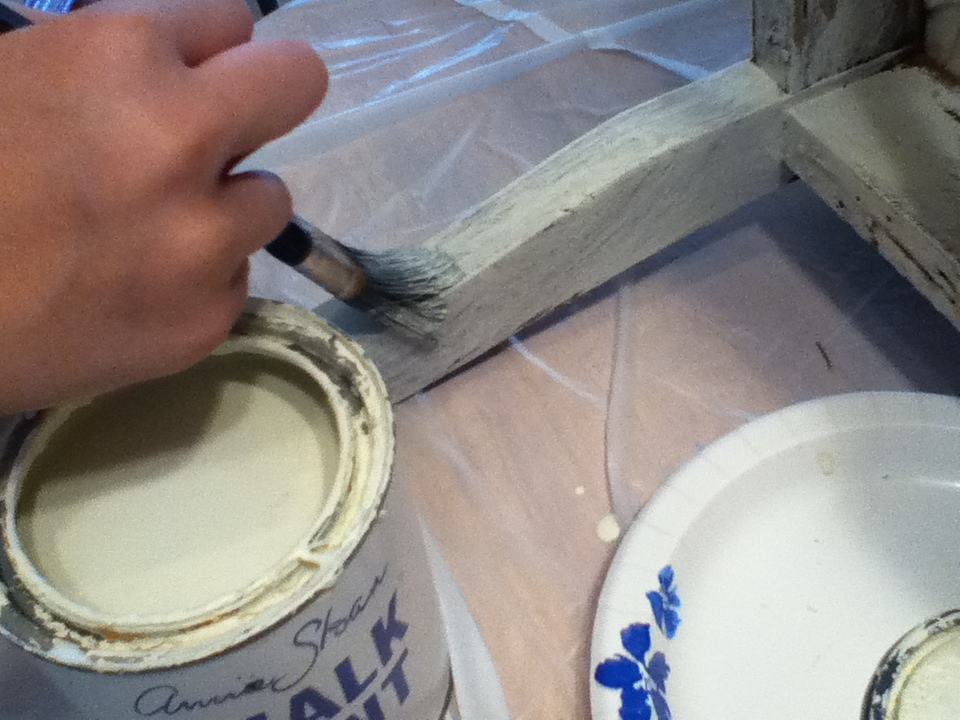
She was finally ready to paint. I used Annie Sloans Chalk paint in “Old White” and put 2 coats on. I love this paint because “less is more”. And the bloody stuff lasts for-E-ver. I'm still using a can of Old White that I bought back in May of last year!

The chair was then sanded here and there for a “I just came out of a French barn” look. After that, it was wax with Annie Sloan's clear wax, and then a little dark stain here and a little dark stain there using Fiddle & Sons jojobean stain wax (the same stuff as the fireplace mantel). I emphasized the carvings in the wood as those really need to pop when you saw them.

I had already re-stuffed the cushion and chair back, and covered and stapled it in with linen. No I did NOT use a regular stapler; I did get a electric staple gun for this! Next I used a 1940's French Grain Sack made of jute. I pulled out the old upholstery on the chair and used those as templates for the three pieces I was going to need for the front and back. This took a lot of planning since I wanted the chair to look just so.
Frankly..... it took a few months!
I managed to get the seat cover cut and then it stopped there. I mean it really stopped! I put the chair beside my desk and kept looking at it trying to get a design going that would fit the chair design itself.

I know it sounds complicated, but just think of it as my OCD side meeting up with my ADD side. It's quite a relationship those two have going. It can get a little test-y at times though.
I settled on piping, but not regular piping. I wanted the stamp on the grain sack not to be cut up by sewing piping on so I decided to fit it under the sack image itself. Not too hard to do, but definitely time consuming. This left an overlapping of fabric on each side of the cushion to work with. A big plus in my book!
Then came staring at the freaking chair for a few more weeks days. Remember, it is the first time I've ever reupholstered anything. The hubs was buying me lot's of chocolate through this process. I think it was at this point I recall him saying:
“Honey, I think you bit off more than you can chew this time with this chair.”
Boy, was I gonna show him!!
And was he really talking about the chair or the amount of chocolate I was eating by this time???
I was seriously addicted to this stuff:

I decided on using the stripes from the grain sack as the side panels of the cushion. My OCD side of me dictated that they must be perfectly aligned on each side. Plus it would make working around the arms of the chair easier when it came to putting the braiding on. It went on like a charm and was much easier than I anticipated.

“Thank GOD for that slipcover class I took!”
Then, something about the chair was bothering me at that point. It wasn't looking right. I went through several different choices of fabrics for the chair back and front as I had changed my mind about doing the whole thing in a grain sack. This took a few more weeks.
Yes, I was planning on finishing the chair before the Rapture, thank you very much!!
It finally dawned on me that the color of the chair itself was all wrong for the grain sack I was using. I just LOVE it when “Ah-HA” 2 by 4 hits me up the side of the head.
I painted the whole chair, wax and all, in Annie Sloan's Coco paint this time. Sanded, wax, stained waxed, and stood back in awe. No, I did not take the old paint and wax off. That is what 's so wonderful about this paint; it's made for screwing up!! The chair was now perfect!
After repainting - redoing this chair was full speed ahead now. I was on to hot gluing the cushion on. Several glue gun burns later, I was gluing the braiding on as well. I even got the chair back-front on as well.
Then the same stripes, but in opposite directions, were glued and braided to the arm chairs. Did I forget to mention those?

The chair back-front braiding was finished and the day after, I stenciled some graphics on the chair front and back piece as well. The chair back was finished and she... was....


DONE!
Well, except for those wheels. Luckily through all this, I had managed to pick up a few castor wheels that matched the original ones that were on the back legs. The front ones were not the original ones and they didn't fit properly as they kept falling out whenever the chair was moved. So I bought metal castor sockets - grip neck style - from Ace Hardware and placed them in the castor holes and slipped in the matching wheels I had purchased.
I was in love!

I finally decided to sell her because, well, that's what I do now; find it – fix it – redesign it – sell it!
I put her up on Etsy and she has created a firestorm in my email box these days. The biggest issue being how to ship her for less than I'm selling her for! Anyone have any ideas on this????
Vintage Resurrections
- est 2011 -


I have no wisdom on the shipping of a chair - I've never tried to mail something that large.
ReplyDeleteYou did a great job with this! I have never tried that kind of a project, but it looks massive, and I'm super impressed.
The chair is lovely.
Oh good grief! Fit for a queen! I like your style!
ReplyDeleteShipping vintage chair can be risky. Be prepared to have people at the destination who can touch up and maybe damaged it.
ReplyDelete